 Pin this
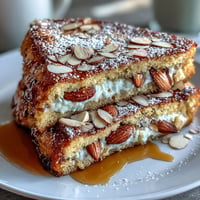
 My first msemen came from a street vendor in Marrakech, steam still rising from the pan, the vendor's hands moving with practiced grace as she folded and pressed. I watched her transform simple dough into crispy, honeyed squares that shattered between my teeth, each layer releasing butter and toasted semolina. Years later, I attempted to recreate that moment in my own kitchen, and after a few clumsy tries, I realized the magic wasn't in exotic ingredients—it was in patience and the rhythm of folding.
I made these for my neighbor one Sunday morning, and the smell of them frying brought her to my kitchen door before I'd even finished the second batch. She sat at my counter, honey dripping down her chin, and told me they reminded her of her grandmother's kitchen in Fez. That's when I understood—msemen isn't just breakfast; it's an invitation to slowness and presence.
Ingredients
- All-purpose flour: The foundation—use a good quality one, and measure by spooning and leveling rather than scooping straight from the bag to avoid overworking the dough.
- Fine semolina: This is the secret to that distinctive sandy texture and slight grittiness that makes msemen recognizable.
- Warm water: Temperature matters more than you think; too hot kills the yeast, too cold and the dough stays stubborn and dense.
- Instant yeast (optional): Skip it for traditional density, use it if you prefer a slightly lighter, airier crumb.
- Vegetable oil: Neutral and high-heat tolerant, it's essential for both the dough handling and frying without burning.
- Unsalted butter: Brushed generously between folds, this creates those shattered layers; salted butter will make some folds too salty.
- Honey for serving: Warm it gently so it flows into every crevice instead of sitting on top.
Tired of Takeout? 🥡
Get 10 meals you can make faster than delivery arrives. Seriously.
One email. No spam. Unsubscribe anytime.
Instructions
- Mix and knead the dough:
- Combine your dry ingredients and gradually add warm water while mixing, then knead for a full 10 minutes until the dough becomes smooth and elastic—your arms will know when it's ready because it'll stop resisting. This kneading develops gluten, which gives you those layers later.
- Let it rest:
- Cover the dough and give it 15 minutes to relax; you're not looking for rise here, just a moment for the gluten to settle and the dough to become easier to stretch.
- Portion and prep:
- Divide into 8 equal balls, oil your hands generously, and work on an oiled surface—dry hands tear the dough, but oiled hands glide.
- Stretch and fold:
- Using oiled hands, flatten each ball into a thin, almost see-through circle, working gently from the center outward. Brush with melted butter, sprinkle semolina, then fold the edges in toward the center to create a square, buttering and semolina-ing each fold as you go.
- Brief rest before cooking:
- Let the folded squares sit for 5 minutes on an oiled surface so they don't stick and seal.
- Gentle flatten and pan-fry:
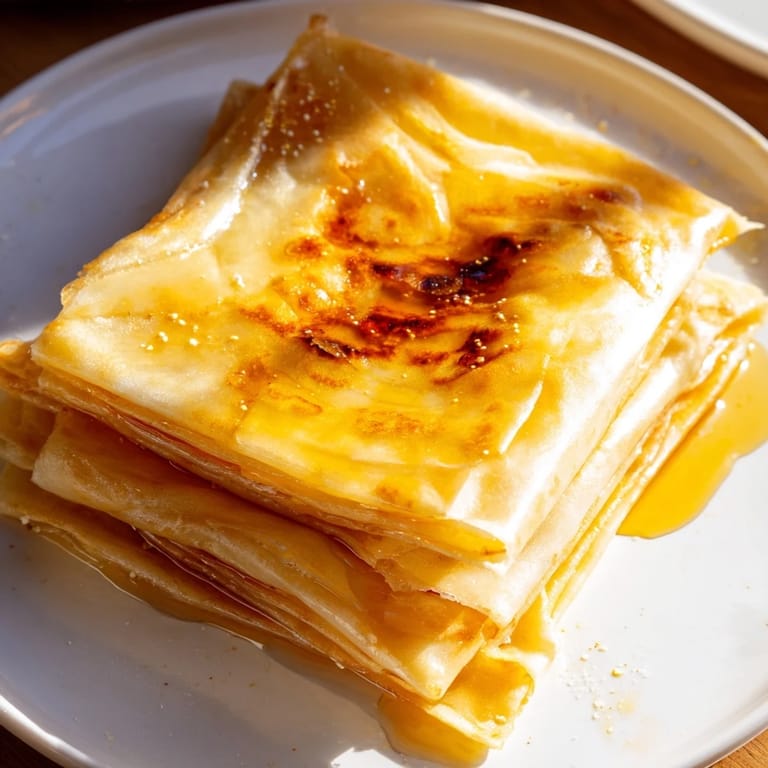
- In a hot, lightly oiled non-stick skillet, gently press each square to about 1/4-inch thickness and fry for 2–3 minutes per side until the surface turns deep golden and you can see the flaky layers beginning to separate. Listen for the gentle sizzle; too quiet means the heat's too low.
- Serve immediately with honey:
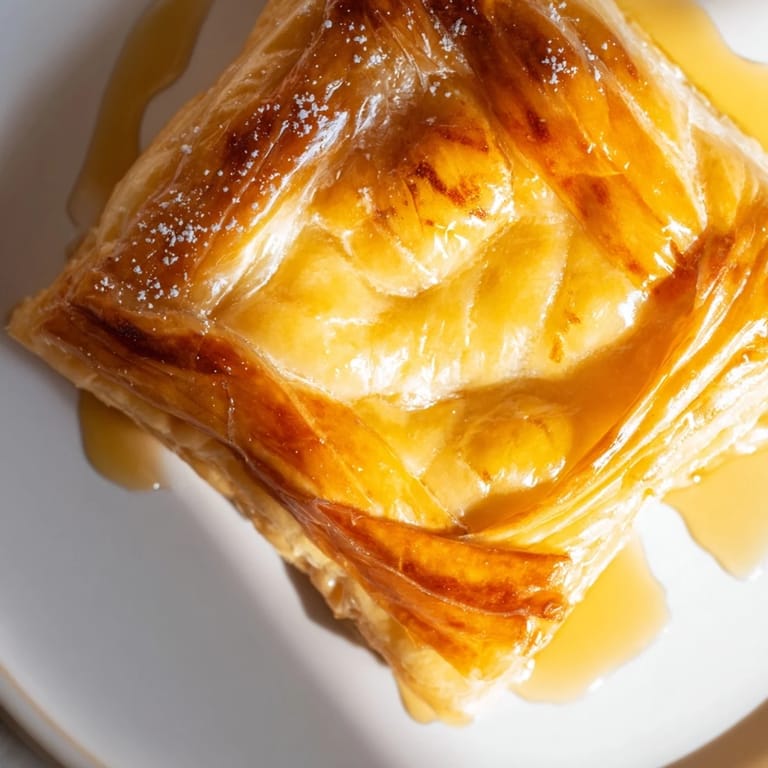
- Transfer to a plate while still warm and drizzle generously with warmed honey so it pools in every fold.
 Pin this
 One rainy afternoon, I made these for my daughter and watched her bite into one, her eyes widening as the layers crackled. She said, without hesitation, that it tasted like time travel—something her great-grandmother might have eaten. In that moment, I realized these simple pastries carry stories across continents and generations.
The Art of the Stretch
Stretching msemen dough is meditative once you stop fighting it. Your oiled hands should work gently from the center of each ball outward, rotating as you go, creating a circle so thin you can almost see through it. The dough will sometimes tear—that's okay, you just patch it with a small piece and keep going. There's a rhythm to this work that becomes almost musical after your second or third pastry, and your body remembers it better than your mind.
Layering and Butter Strategy
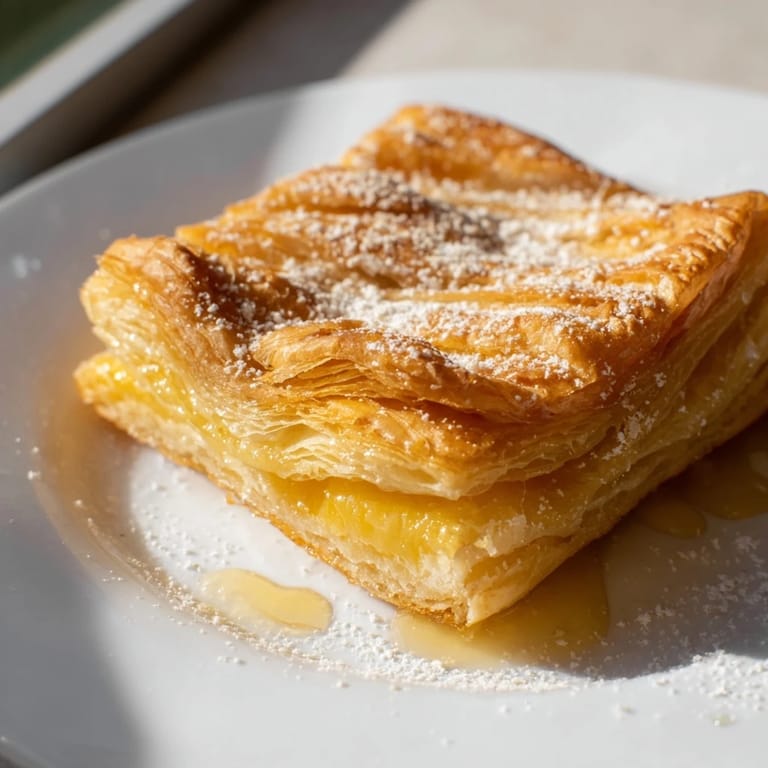
The magic of msemen lives in those butter-and-semolina layers. As you fold each edge toward the center, you're not just folding dough; you're creating pockets of butter that will steam and separate during frying. I learned the hard way that skimping on butter defeats the purpose—these pastries need that richness to develop their characteristic shatter. Semolina sprinkled between each fold adds texture and prevents the layers from sticking to each other during cooking.
Frying, Timing, and the Golden Rule
The skillet is where msemen transforms from pale and soft to golden and crispy, and this is where presence matters most. Watch for the color change and listen to the sound of frying; a gentle sizzle means you're on track, while a loud crackle or silence are both warnings. The semolina scattered on top will brown slightly and add a gentle crunch that sets these apart from other pastries.
- Keep a gentle hand when pressing the square flat in the skillet—you want to encourage flaking, not compression.
- Add a bit more oil to the pan between batches to maintain consistent frying temperature.
- Transfer finished msemen to a plate immediately so they cool slightly and set up, rather than steaming themselves into sogginess.
 Pin this
 Every time I make msemen, I think of that vendor in Marrakech and the way she moved through her work with such certainty. These pastries deserve that same attention and care, and the reward—crispy, buttery, honeyed—is always worth it.
Recipe Questions
- → What gives msemen its flaky texture?
The flakiness comes from the layering technique where dough is brushed with butter and semolina, then folded repeatedly before frying, creating tender, crisp layers.
- → Can I make msemen without yeast?
Yes, yeast is optional and mainly helps lighten the texture, but traditional msemen can be made without it by focusing on proper kneading and resting.
- → What's the best pan to cook msemen in?
A non-stick skillet or cast-iron pan works best, allowing even heat distribution to achieve a golden, crispy crust without sticking.
- → How do I store and reheat msemen?
Store leftovers in an airtight container at room temperature for up to two days. Reheat gently in a skillet or toaster to restore crispness.
- → What are some popular accompaniments for msemen?
Msemen pairs well with warm honey, almond-honey spreads like amlou, fresh jam, or a sprinkle of cinnamon for added flavor.