 Pin this
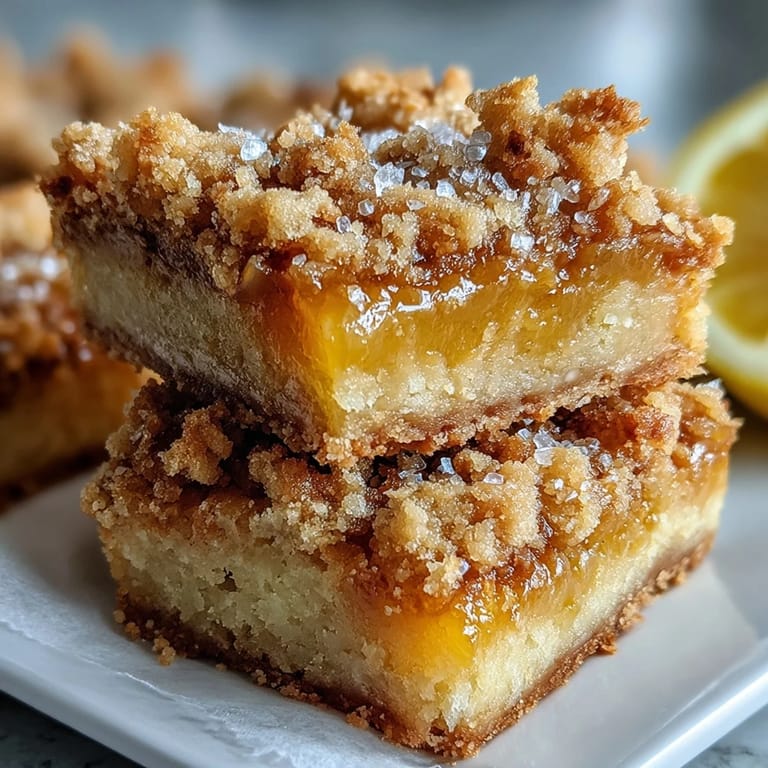
 The kitchen smelled like summer even though snow was piling up outside. I was zesting lemons over the counter, and the spray of citrus oil caught the afternoon light. My sister had just called asking for something sweet but not too heavy, and I remembered these bars from a bake sale years ago. I pulled out my baking pan without a second thought. Sometimes the best recipes are the ones you make on impulse.
I brought these to a potluck once, stacked in a glass container with parchment between the layers. They vanished before the main course even hit the table. One friend grabbed two bars and tucked a third into a napkin for later. That was the moment I realized I had a recipe worth keeping. The compliments felt good, but watching people go back for seconds felt better.
Ingredients
- All-purpose flour: This forms the base and structure of both the crust and the crumb topping, creating that tender, melt-away texture you want in every bite.
- Granulated sugar: Sweetness in the crust keeps it from tasting flat, and in the filling it balances the sharp lemon without overpowering the citrus.
- Baking powder: A little lift in both the crust and filling gives you a lighter texture instead of something dense and heavy.
- Salt: Just a pinch sharpens all the flavors and keeps the sweetness from feeling one-note or cloying.
- Unsalted butter: Melted butter makes the crumb topping come together fast and adds rich, golden flavor that contrasts beautifully with the tart filling.
- Large eggs: They bind the lemon filling and give it a soft, custard-like set that holds its shape after chilling.
- Fresh lemon juice: Bottled juice will never give you the same bright, clean zing that freshly squeezed lemons deliver.
- Lemon zest: The oils in the zest add a deeper, more aromatic lemon flavor that juice alone cannot provide.
- Powdered sugar: A light dusting right before serving adds a elegant finish and a little extra sweetness on top.
Tired of Takeout? 🥡
Get 10 meals you can make faster than delivery arrives. Seriously.
One email. No spam. Unsubscribe anytime.
Instructions
- Preheat and Prep Your Pan:
- Set your oven to 350°F and grease or line your 9x9-inch pan with parchment, leaving some overhang so you can lift the bars out later. This small step saves you from prying bars out with a knife.
- Mix the Crumb Base:
- Combine the flour, sugar, baking powder, and salt in a bowl, then pour in the melted butter and stir until the mixture looks like wet sand. It should clump when you press it but still feel crumbly.
- Form the Crust:
- Reserve half a cup of the crumb mixture in a small bowl, then press the rest firmly into the bottom of your pan. Use the bottom of a measuring cup to really pack it down evenly.
- Bake the Crust:
- Slide the pan into the oven for 10 to 12 minutes until the edges just start to turn golden. You want it set but not deeply browned.
- Whisk the Lemon Filling:
- While the crust bakes, whisk together eggs and sugar until smooth, then add lemon juice, zest, flour, baking powder, and salt. Keep whisking until no lumps remain and the mixture is silky.
- Pour and Top:
- Pull the hot crust from the oven and immediately pour the lemon filling over it, then scatter the reserved crumbs evenly on top. The heat helps the filling start to set right away.
- Bake Until Set:
- Return the pan to the oven for 20 to 25 minutes, watching for the filling to lose its jiggle and the crumbs to turn light gold. The center should look just barely set.
- Cool and Chill:
- Let the bars cool in the pan for at least an hour, then transfer to the fridge for another hour or more. Chilling firms up the filling so you get clean, neat slices.
- Slice and Serve:
- Use a sharp knife, wiping it clean between cuts, to slice into 16 squares. Dust with powdered sugar right before serving for a beautiful finish.
 Pin this
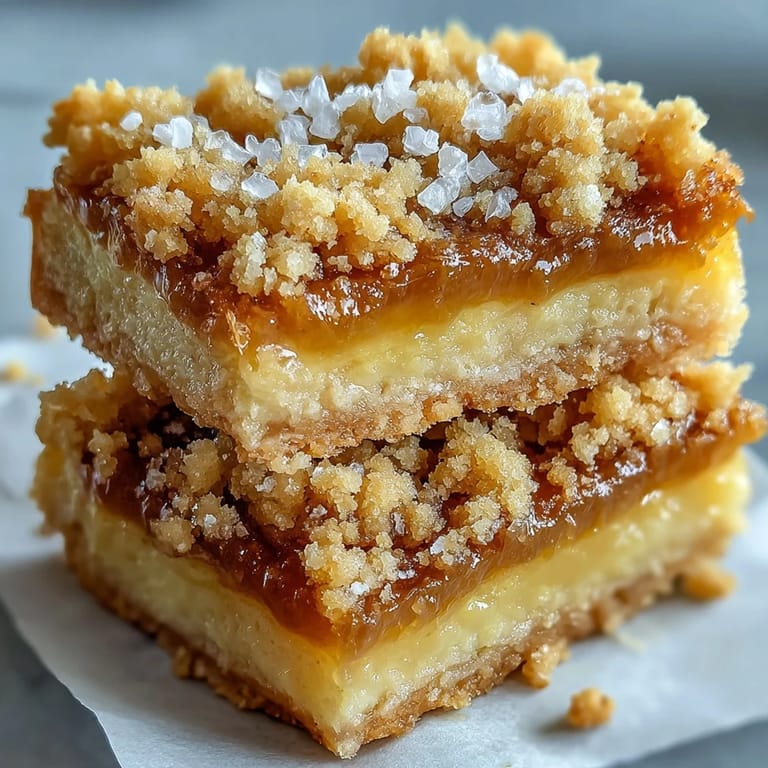
 I served these at a small birthday gathering once, and my friend who claimed she did not like lemon desserts ate three bars. She said the crumb topping changed everything, softening the tartness just enough. I tucked the recipe card into her hand on her way out the door. That is when I knew this recipe was a keeper, not just for me, but for anyone who tries it.
How to Store and Keep Them Fresh
These bars keep beautifully in an airtight container in the fridge for up to a week, which makes them perfect for meal prep or make-ahead entertaining. I stack them with parchment paper between the layers so they do not stick together. You can also freeze them for up to a month, just thaw in the fridge overnight before serving. The cold actually improves the texture, making the filling firmer and the crumbs more defined.
Ways to Customize the Flavor
Swap the lemon for lime juice and zest if you want a slightly more floral, tropical twist. Add a tablespoon of cornstarch to the filling if you prefer a firmer, more sliceable texture. I have also stirred a few drops of almond extract into the crumb mixture for a subtle nutty undertone. You can reduce the sugar in the filling by a couple tablespoons if you like your desserts less sweet, though I would taste the filling before baking to be sure.
Serving Suggestions and Pairings
These bars shine on their own, but they are even better with a dollop of whipped cream or a scoop of vanilla ice cream. I love serving them with hot tea in the afternoon or alongside a chilled glass of Moscato for a light, elegant dessert. They also work beautifully on a brunch table next to fresh berries and coffee.
- Serve them cold straight from the fridge for the best texture and cleanest slices.
- Dust with powdered sugar just before plating so it does not dissolve into the bars.
- Pair with a hot beverage to contrast the cool, creamy filling and enjoy the temperature play.
 Pin this
 Every time I pull these out of the fridge and slice into them, I remember why simple recipes are sometimes the most satisfying. They never fail, they always impress, and they taste like a little bite of sunshine no matter the weather outside.
Recipe Questions
- → Can I use bottled lemon juice instead of fresh?
Fresh lemon juice delivers the brightest, most vibrant citrus flavor. Bottled juice can work in a pinch, but may result in a slightly muted taste and subtle aftertaste. For the best results, squeeze fresh lemons and strain out any pulp or seeds.
- → Why do the bars need to chill for so long?
Chilling allows the lemon filling to fully set, making clean slices possible. Without proper cooling time, the center remains too soft and may ooze when cut. The refrigeration also intensifies the flavors and creates that perfect creamy yet firm texture.
- → Can I make these bars gluten-free?
Yes, substitute the all-purpose flour with a 1:1 gluten-free flour blend that includes xanthan gum. The texture should remain quite similar, though the crumbs may be slightly more delicate. Ensure all other ingredients, especially baking powder, are certified gluten-free.
- → How do I know when the bars are done baking?
The edges should be lightly golden and the filling set with just a slight jiggle in the center—similar to cheesecake. The crumb topping will turn golden brown. Avoid overbaking, which can cause the filling to crack or become rubbery.
- → Can I freeze these lemon bars?
Absolutely. Wrap the uncut slab tightly in plastic and foil, or freeze individual portions in an airtight container. They'll keep well for up to 3 months. Thaw overnight in the refrigerator before serving. Note that the crumb topping may soften slightly after freezing.
- → What's the best way to get clean cuts?
Chill thoroughly—at least 2 hours total. Use a sharp knife wiped clean between cuts. For extra neat squares, run the knife under hot water, dry it, then slice. Some bakers prefer lifting the entire slab out using parchment paper edges before cutting on a cutting board.