 Pin this
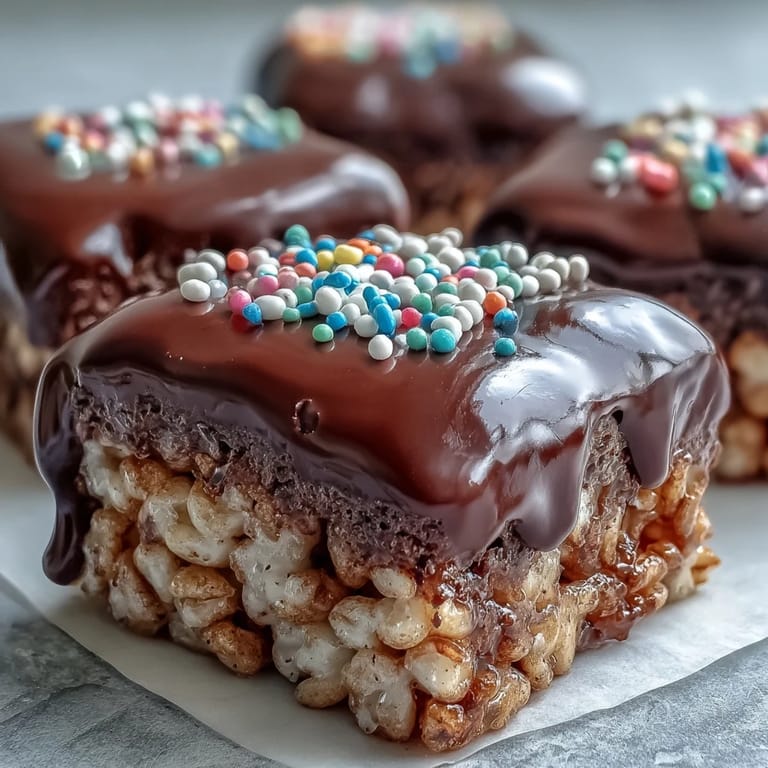
 My niece once asked if dessert could sound like tiny fireworks, and I handed her one of these. The snap of cereal under chocolate became her favorite thing to listen for at birthday parties. We started making double batches—one tray never lasted past the first hour. That crackle, that sweet give of marshmallow against dark chocolate, turned a simple pantry staple into the most requested treat in our family.
I brought a platter of these to a neighborhood cookout one summer, and by the time I turned around to grab a napkin, half were gone. A kid with chocolate on his cheek asked if I was a professional baker. I laughed and told him the secret was just not overthinking it. That night, three parents asked for the recipe, and I realized sometimes the simplest things leave the biggest impressions.
Ingredients
- Unsalted butter: Melts the marshmallows into a silky binder and adds richness without making the treats greasy if you keep the heat low.
- Mini marshmallows: Melt faster and more evenly than large ones, creating that classic gooey texture that holds everything together.
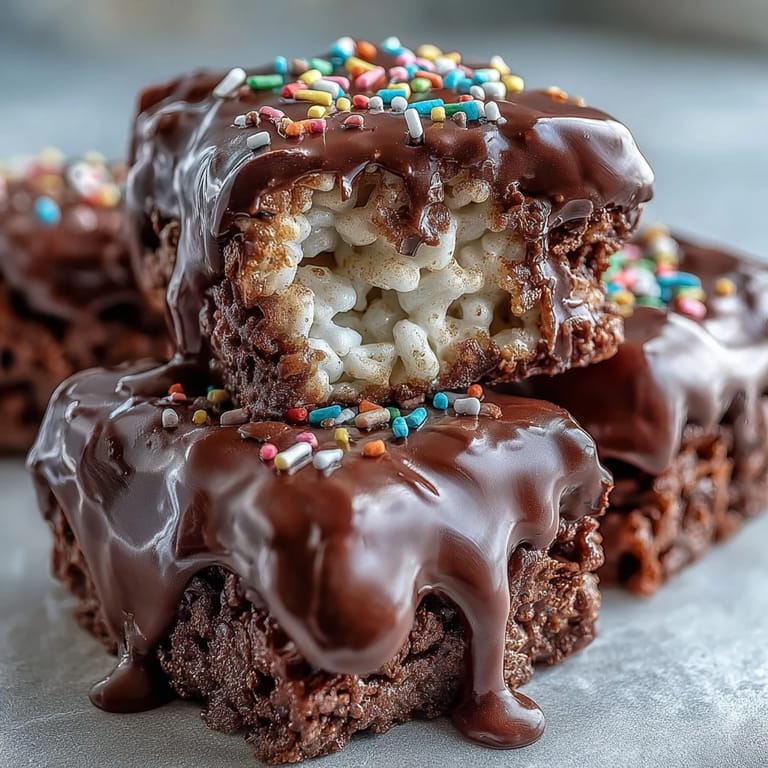
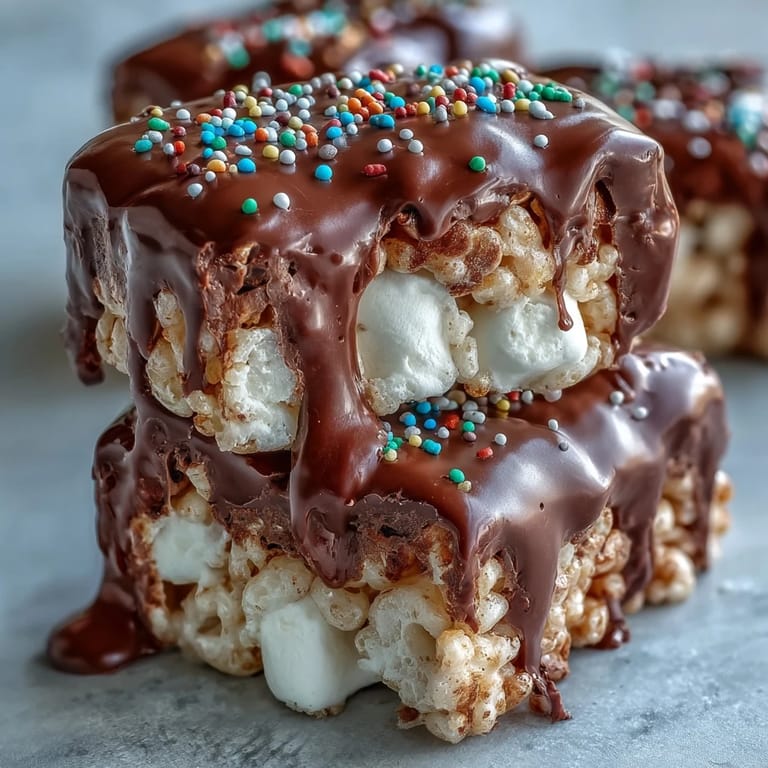
- Rice Krispies cereal: The hero of crunch, light and airy enough to stay crisp even after coating in warm marshmallow.
- Fine sea salt: A pinch cuts through the sweetness and makes the chocolate topping taste even more luxurious.
- Semisweet or dark chocolate chips: Choose based on how sweet you like things, dark chocolate adds a sophisticated edge while semisweet keeps it crowd friendly.
- Vegetable oil or coconut oil: Thins the chocolate just enough to pour smoothly and creates that glossy, bakery style finish.
- Rainbow sprinkles or chopped nuts: Pure fun, they add color, crunch, or both depending on your mood and audience.
Tired of Takeout? 🥡
Get 10 meals you can make faster than delivery arrives. Seriously.
One email. No spam. Unsubscribe anytime.
Instructions
- Prep your pan:
- Grease that 8x8 inch or 9x9 inch pan generously with butter so the bars lift out cleanly later. If you have parchment paper, line it for even easier release.
- Melt the butter:
- Set your saucepan over low heat and melt the butter slowly, stirring often to keep it from browning. Patience here pays off with a cleaner flavor.
- Melt in the marshmallows:
- Add the mini marshmallows to the melted butter and keep stirring until they melt into a smooth, glossy mixture. This takes a few minutes, and the motion keeps it from sticking to the pan.
- Season and mix:
- Pull the pan off the heat and stir in the sea salt if you are using it. Then add the Rice Krispies and fold gently with a spatula until every piece is coated but not crushed.
- Press into the pan:
- Scrape the mixture into your prepared pan and press it down evenly using a buttered spatula or your hands. Firm pressure makes bars that hold together, but do not compact it so hard that it loses all airiness.
- Cool briefly:
- Let the base sit at room temperature for about 10 minutes to set up just enough that the chocolate will not sink in.
- Melt the chocolate:
- Combine chocolate chips and oil in a microwave safe bowl and heat on medium power in 30 second bursts, stirring after each until smooth and glossy. Do not rush this or the chocolate can seize.
- Top with chocolate:
- Pour the melted chocolate over the cooled cereal layer and spread it evenly with an offset spatula or the back of a spoon. Work quickly while it is still fluid.
- Add the finishing touch:
- Scatter rainbow sprinkles or chopped nuts over the wet chocolate right away so they stick. This is where personality comes in.
- Let it set:
- Leave the pan at room temperature for at least an hour, or pop it in the fridge for 20 to 30 minutes if you are in a hurry. The chocolate needs to firm up completely before cutting.
- Cut into bars:
- Once set, lift the block out using the parchment overhang or invert it onto a cutting board. Use a sharp knife to cut into 12 to 16 bars, wiping the blade between cuts for clean edges.
 Pin this
 One rainy afternoon, my daughter and I made these together and she insisted on arranging the sprinkles in a pattern. It took forever and looked chaotic, but when her friends came over, she pointed at each bar and told them which one was hers. That messy pride made the whole kitchen worth cleaning up twice. Sometimes the imperfect ones are the most loved.
Storing and Keeping Them Fresh
These bars stay delicious in an airtight container at room temperature for up to three days, though they rarely last that long in my house. If your kitchen runs warm or you want them to hold their shape longer, the fridge works beautifully for up to a week. Just let them come to room temperature for a few minutes before serving so the chocolate is not too hard. I have also frozen them between layers of parchment paper for up to a month, and they thaw perfectly for last minute gatherings.
Flavor Twists Worth Trying
Stirring half a teaspoon of vanilla extract into the melted marshmallows adds a warm, bakery scent that makes the whole kitchen smell amazing. For holidays, swap semisweet chocolate for white chocolate and use pastel or seasonal sprinkles to match the occasion. I have also folded in a handful of mini chocolate chips or toffee bits with the cereal for extra pockets of sweetness. One friend drizzles peanut butter over the chocolate layer before it sets, and I can not argue with that logic.
Cutting Clean Bars Every Time
The secret to neat edges is a sharp knife and a little patience. I run my knife under hot water, dry it off, then make one cut and wipe the blade clean before the next. It sounds fussy, but it only adds a minute and the bars look bakery perfect. If you lined your pan with parchment paper, lifting the whole block out before cutting gives you even more control.
- Use a gentle sawing motion instead of pressing straight down to avoid crushing the crispy layers.
- If the chocolate cracks, let the bars sit at room temperature for a few extra minutes to soften slightly.
- Smaller bars mean more servings and less guilt when someone sneaks a second piece.
 Pin this
 These treats remind me that some of the best recipes do not need fancy techniques or hard to find ingredients. Just a little care, a willingness to get your hands sticky, and the joy of sharing something that makes people smile.
Recipe Questions
- → How do I prevent the marshmallow from sticking to my hands?
Butter your hands or spatula thoroughly before pressing the mixture into the pan. You can also lightly grease your hands with vegetable oil or coconut oil for easy handling.
- → Can I use white chocolate instead of semisweet?
Absolutely! White chocolate works beautifully and creates a lovely contrast. For a festive look, pair white chocolate with pastel sprinkles during holidays or special occasions.
- → Why does my chocolate seize when melting?
Chocolate seizes when moisture gets into it. Always use a dry bowl and utensils. Adding the teaspoon of oil helps create a smooth, glossy finish and prevents seizing.
- → How long should I let them set before cutting?
Let the treats set at room temperature for at least 1 hour until the chocolate is firm. For faster results, refrigerate for 20–30 minutes, but bring them to room temperature before serving for the best texture.
- → Can I make these ahead for a party?
Yes! Prepare them up to 2 days in advance and store in an airtight container. They actually taste better the next day as flavors meld together. Cut just before serving for the freshest appearance.
- → What's the best way to get clean cuts?
Use a sharp knife wiped clean between cuts. For perfectly uniform bars, you can briefly warm the knife under hot water and dry it before slicing through the chocolate layer.