 Pin this
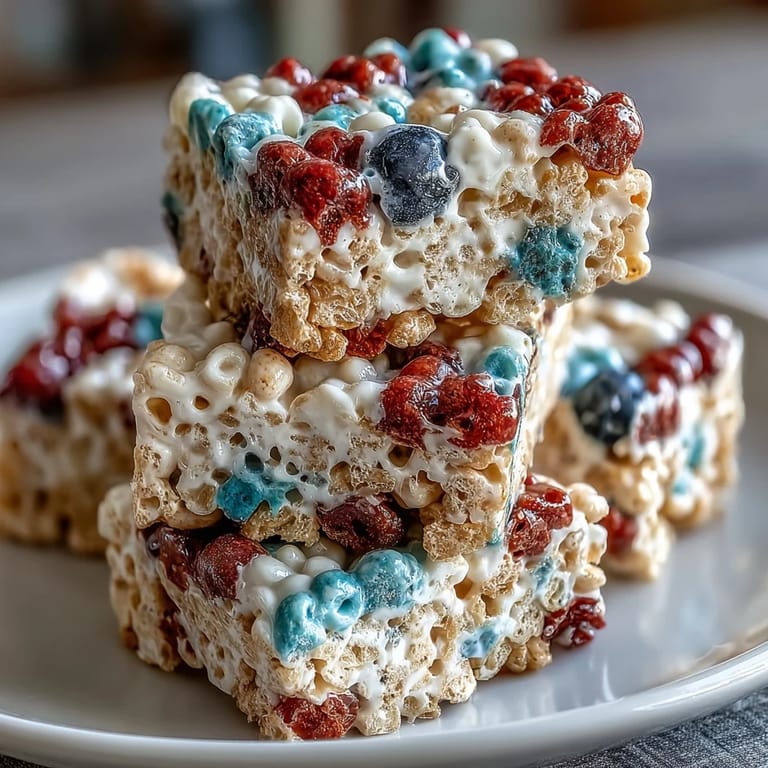
 My kitchen smells like melted marshmallows and anticipation every Fourth of July, and honestly, it's become the unofficial start to our neighborhood barbecue. One year, my neighbor's kid pressed their nose against the screen door asking if the treats were ready, and I realized these striped squares had somehow become tradition before I even finished the first batch. There's something about layering red, white, and blue into something so simple and chewy that makes you feel like you're doing something patriotic, even if you're just standing over a hot pan in your pajamas.
I made these for the first time on a whim during a heat wave, thinking a no-bake dessert was the only sensible choice. My son watched me layer each color with the intensity of someone defusing a bomb, asking approximately seventeen times if we were sure it was going to look like the flag. When we finally cut into that cooled pan and the stripes lined up perfectly, he literally cheered, and I learned that day that food can be pure joy before it even touches anyone's mouth.
Ingredients
- Rice Krispies cereal: Use the classic version for that signature texture; the brand actually matters here because the pieces hold the marshmallow coating better than generic knockoffs.
- Mini marshmallows: Smaller marshmallows melt faster and distribute more evenly than regular ones, which I learned after a frustrating batch where some stayed chunky.
- Unsalted butter: Dividing it into three portions (1 tablespoon each) keeps each layer separate and prevents flavors from bleeding together, which is the secret to crisp color transitions.
- Vanilla extract: Just for the white layer, it adds a subtle depth that keeps things interesting instead of tasting like pure sweetness.
- Gel food coloring: This is non-negotiable; liquid coloring will make your mixture soggy and muddy-looking, trust me on this one.
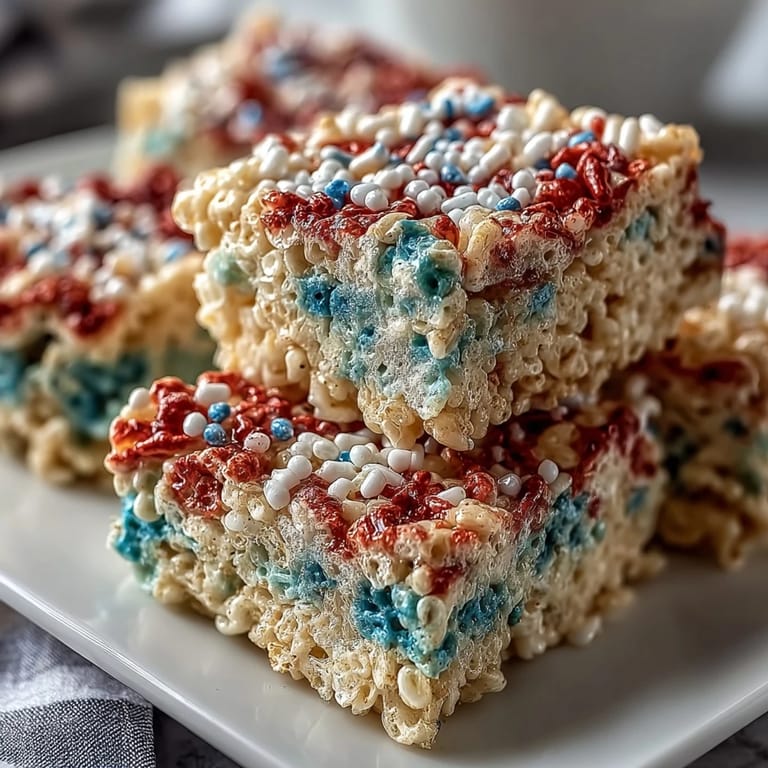
- Red, white, and blue sprinkles: Optional, but they're worth the extra handful of dollars if you want that showstopper moment when you set them out.
Tired of Takeout? 🥡
Get 10 meals you can make faster than delivery arrives. Seriously.
One email. No spam. Unsubscribe anytime.
Instructions
- Set up your canvas:
- Line that 9x9-inch pan with parchment paper and give it a light grease so your finished treats slide out without drama. This step takes thirty seconds and saves you ten minutes of cursing later.
- Divide everything into thirds:
- Split your marshmallows and butter into three equal portions before you start heating anything. This way you're not scrambling mid-layer trying to eyeball measurements while hot marshmallow goo is cooling down.
- Make the red layer:
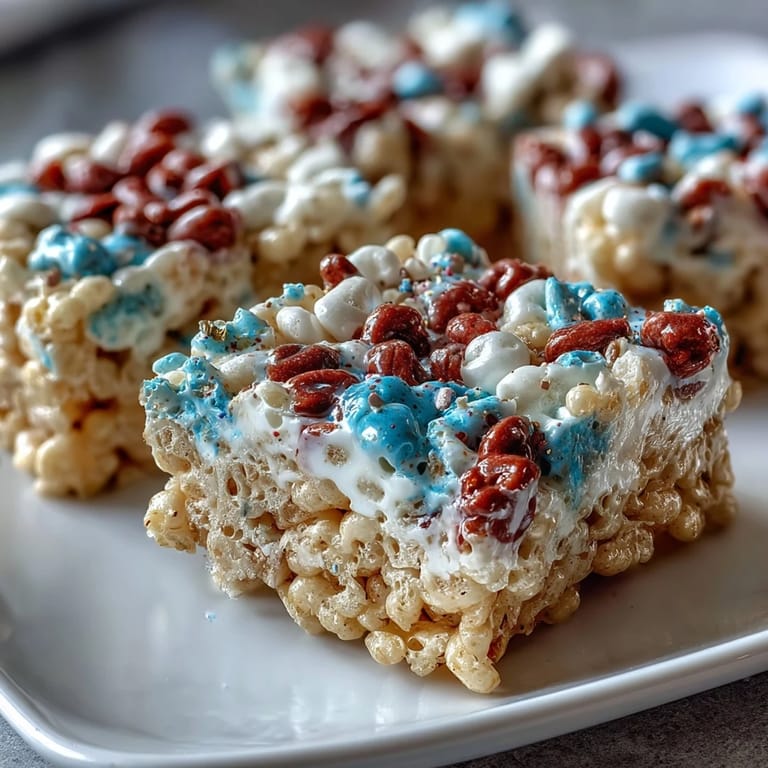
- Melt 1 tablespoon butter in your saucepan over low heat, add one portion of marshmallows, and stir until they're completely smooth and fluid. Add a few drops of red gel coloring and watch as it transforms into this gorgeous coral-to-crimson shade depending on how brave you're feeling.
- Add the cereal and press:
- Pour in 2 cups of Rice Krispies and fold everything together until every piece is coated in that marshmallow mixture, then transfer to your pan and press it down firmly but gently using a lightly greased spatula or your hands. Don't be timid here; you want it packed enough to hold together but not so hard you compress all the air out of it.
- Create the white layer:
- Wipe your saucepan clean because any red residue will mess with your pristine white layer, then repeat the process with another tablespoon of butter and your second portion of marshmallows. Stir in a half-teaspoon of vanilla extract to give this layer its own identity, then add the cereal and layer it gently on top of the red.
- Finish with blue:
- One more clean saucepan, final butter portion, remaining marshmallows, and your blue gel coloring to create that top layer. Press it down carefully so you don't accidentally squish everything back down and lose your beautiful striping.
- Sprinkle if you're feeling festive:
- While everything is still slightly warm and a touch sticky, scatter your red, white, and blue sprinkles across the top if that's your vibe. They'll stick better and look more intentional than if you wait until it's completely cool.
- Be patient and let it set:
- This is the hardest part because your kitchen smells amazing and your treats look ready, but a full hour of cooling time is what transforms them from sticky pressing into sliceable squares. I know it feels endless, but trust the process.
 Pin this
 There's a moment during that cooling hour when you stop checking on them every five minutes and realize you've created something that makes people happy before they even taste it. These treats sit on a plate looking like edible nostalgia, and suddenly the holiday feels more real somehow.
The Sticky Situation (And How to Handle It)
Sticky hands are the number one complaint with Rice Krispies treats, and the solution is so simple it's almost embarrassing. Either lightly grease your hands with butter or cooking spray before pressing each layer, or use a silicone spatula that you've also given a quick coating. I've learned that prevention beats frustration every single time, and your hands stay clean enough to not look like you've been wrestling with the marshmallows.
Storage and Make-Ahead Magic
These treats last up to three days in an airtight container, which means you can actually make them the night before your party and feel like you have your life together. I've found that storing them in a cool spot (not the fridge, which makes them dense) keeps them at that perfect chewy texture, and they travel surprisingly well if you layer parchment between the pieces so they don't stick to each other.
Flavor and Color Variations That Worked
Once you nail this basic version, the real fun begins because this recipe is basically a blank canvas for patriotic creativity. You could use different extracts in the white layer, swap sprinkles for crushed candy, or even press a white chocolate square on top before it sets if you want to get fancy about it. Here are some tweaks that turned casual batches into something people actually requested by name:
- Add a quarter-teaspoon of almond extract to the white layer for a subtle flavor complexity that makes people ask what the secret ingredient is.
- Toast your Rice Krispies in a dry pan for five minutes before mixing them in to add a barely-there nutty depth that transforms the whole thing.
- Use salted butter instead of unsalted butter and add a tiny pinch of sea salt to the white layer because sweet and salty is where magic lives.
 Pin this
 These treats are proof that the best holiday food isn't complicated, it's just intentional. Make them with someone, make them for someone, or make them for yourself on a random Tuesday because you deserve something that tastes like celebration.
Recipe Questions
- → What type of food coloring works best for vibrant layers?
Gel food coloring is recommended for bright, vivid layers without softening the mixture.
- → How do I prevent the marshmallow mixture from sticking?
Lightly grease your hands or a spatula when pressing the mixture into layers to avoid sticking.
- → Can I add flavor variations to the layers?
Adding a pinch of salt or using salted butter can enhance the flavor of the treats.
- → What pan size is ideal for shaping these layers?
A 9x9-inch baking pan lined with parchment ensures even shaping and easy removal.
- → How long should the layered treats cool before slicing?
Allow at least one hour of cooling to let the layers set firmly for clean slices.