 Pin this
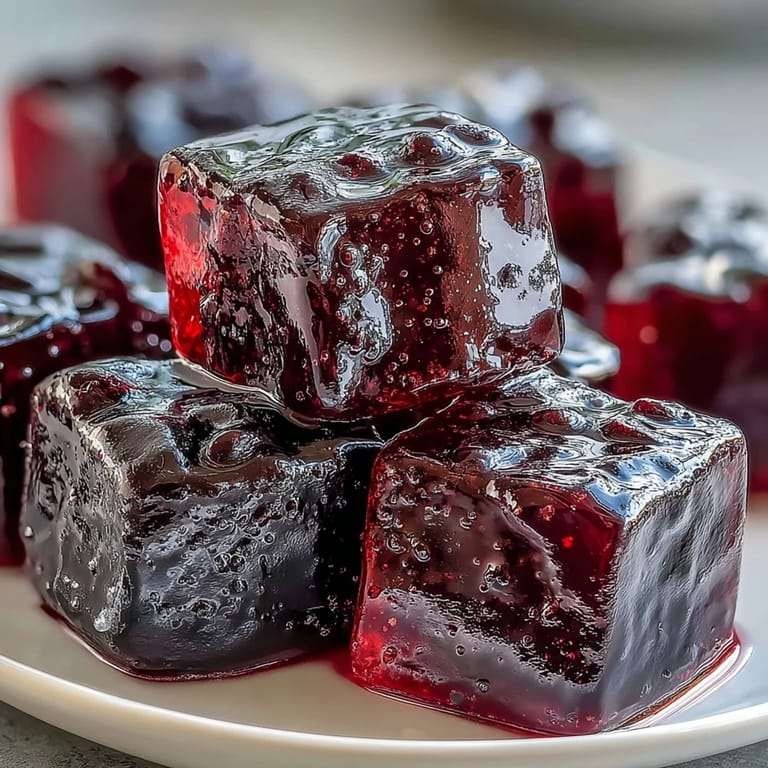
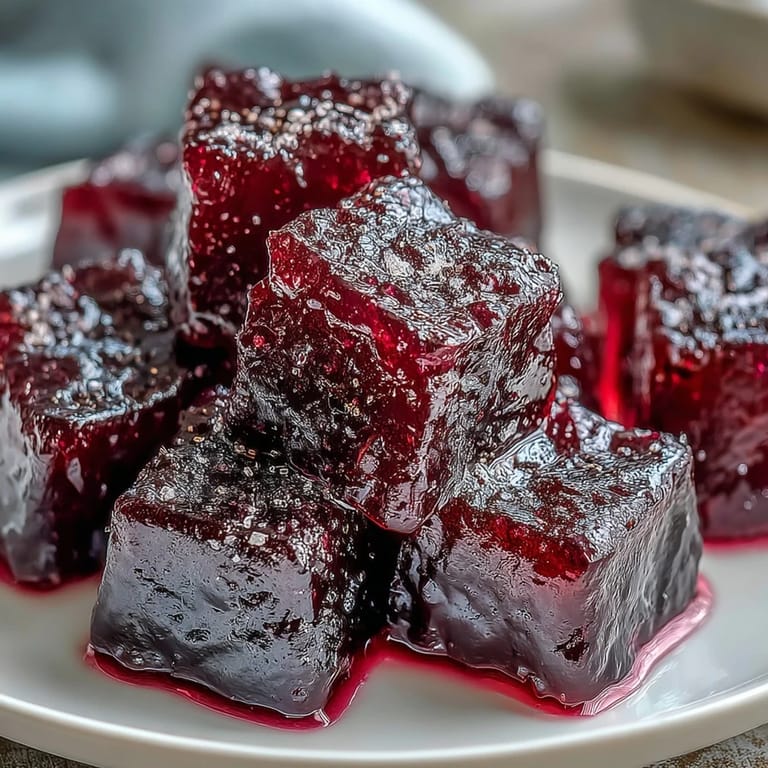
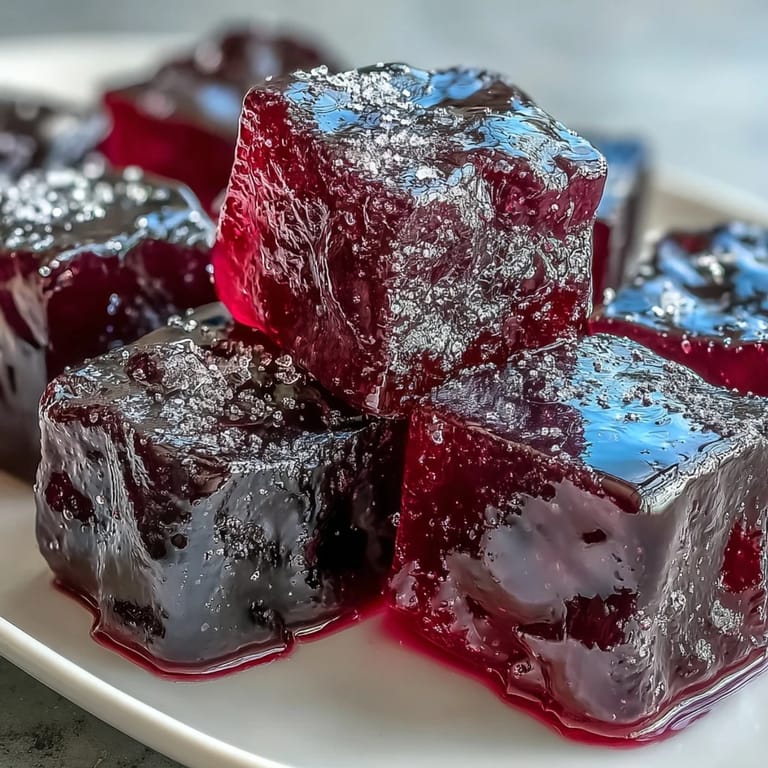
 My neighbor brought over a handful of black currants from her garden one summer, and I had no idea what to do with them—they were too tart to eat straight, but something about their deep purple color felt like they deserved better than the compost bin. That evening, I started experimenting with turning them into gummies, and by the time my kids got home from school, the kitchen smelled like jammy sweetness and possibility. What started as a way to use up a surplus turned into the one homemade candy they actually ask for by name.
I made a batch for my book club one winter, tucking them into little paper cups tied with string, and someone asked if I'd started a candy business. That moment—when something homemade becomes the thing people remember about your gathering—is worth every minute of waiting for them to set in the fridge.
Ingredients
- Fresh or frozen black currants (1 cup): These little berries are tart and vibrant, packed with flavor that really shines once you break them down—if you can only find frozen, they work just as well and honestly take some of the work out of softening.
- Water (1/3 cup for cooking): Just enough to get the currants to release their juice without drowning them.
- Lemon juice (2 tablespoons): A brightness that cuts through the richness and makes the black currant flavor pop instead of flatten.
- Granulated sugar (3/4 cup): This is your sweetness balancer—you can adjust it slightly if your currants are particularly tart or sweet, though I'd be cautious.
- Unflavored powdered gelatin (3 tablespoons): The backbone of the whole thing—powdered dissolves cleaner than sheets, and unflavored means the currants stay the star.
- Cold water (1/3 cup for blooming): This separate batch hydrates the gelatin before heat, which makes it dissolve smoothly without clumping.
- Granulated sugar for coating (1/4 cup, optional): A sparkly finish if you want them to feel extra special, though they're beautiful naked too.
Tired of Takeout? 🥡
Get 10 meals you can make faster than delivery arrives. Seriously.
One email. No spam. Unsubscribe anytime.
Instructions
- Simmer the black currants:
- Place your currants and 1/3 cup water in a saucepan over medium heat and let them bubble away for 5 to 7 minutes—you're listening for the sound to change slightly as they soften and begin bursting. The kitchen will smell almost floral, and that's how you know they're releasing everything they've got.
- Strain into pure magic:
- Once they're soft, pour the whole mess through a fine mesh strainer, pressing gently with the back of a wooden spoon to coax out the juice and pulp. You want about 2/3 cup of liquid gold; discard the skins and seeds.
- Sweeten and add brightness:
- Stir the lemon juice and sugar into your black currant puree, stirring until the sugar completely dissolves—taste it, and if it makes you pucker a little, you're on the right track.
- Bloom the gelatin:
- Sprinkle your powdered gelatin over the cold water in a small bowl and let it sit untouched for exactly 5 minutes. Don't stir—you're just letting it hydrate so it'll dissolve smoothly later.
- Bring it together gently:
- Return the currant mixture to low heat and add your bloomed gelatin, stirring constantly until it disappears into the puree—you should see no grainy bits, and you absolutely should not let this boil or the gelatin will break down. This usually takes 2 to 3 minutes of stirring.
- Pour and settle:
- Pour your mixture into silicone molds or a parchment-lined 8x8-inch pan, then tap the bottom a few times on the counter to release any stubborn air bubbles hiding inside. Patience here prevents weird holes later.
- Let time do the work:
- Refrigerate for at least 2 hours until they're fully set and hold their shape—overnight in the fridge actually makes them firmer if you've got the time.
- Unmold and finish:
- Pop them out of silicone molds or cut into squares with a sharp knife dipped in warm water for clean edges. If you're coating them in sugar, toss them now while they're still slightly sticky.
 Pin this
 My five-year-old once asked why homemade gummies tasted like actual fruit instead of just sugar and mystery, and I realized that's the whole point—you can taste exactly what went into them because you put it there yourself. That simplicity, that honesty, is what keeps people coming back.
Flavor Swaps That Actually Work
The beautiful thing about this recipe is how flexible it is once you understand the framework. Raspberries give you a softer, slightly more delicate flavor; blueberries push toward earthiness; strawberries go sweeter and more fragrant. The ratio stays the same—you're just swapping one cup of berries for another—but each version tastes like a completely different candy.
Vegan and Dietary Swaps
If gelatin isn't in your kitchen for any reason, agar-agar is your answer, though it behaves slightly differently and you'll use about 1.5 tablespoons in place of the gelatin. The texture comes out a bit firmer and more brittle, which some people actually prefer. These gummies are naturally gluten-free by ingredients, but always double-check your gelatin or agar-agar packaging if you're sensitive to cross-contamination.
Storage and Keeping Them Perfect
These gummies live happily in an airtight container in the refrigerator for about two weeks, though they rarely last that long in a house with people who know they exist. If you leave them uncovered overnight in the fridge, they firm up even more—some people see this as a feature, not a bug, especially if you prefer a less bouncy chew.
- Pop them into small paper cups or parchment squares if you're gifting them so they don't stick together in the box.
- A small piece of parchment between layers keeps them from bonding into one delicious brick.
- They'll start to weep and soften at room temperature after about 30 minutes, so keep them cool until you're ready to eat.
 Pin this
 There's something deeply satisfying about making candy that tastes like real fruit and feels like you've pulled off something special, even though you really haven't—you've just been patient and gentle with some simple ingredients. Make these, share them, and watch people taste them twice because they can't believe you made them.
Recipe Questions
- → How long do black currant gummies need to set?
Refrigerate your gummies for at least 2 hours until completely firm. For an even firmer texture, leave them uncovered overnight in the refrigerator before removing from molds or cutting.
- → Can I use frozen black currants instead of fresh?
Absolutely! Frozen black currants work wonderfully in this method. Simply thaw them slightly before simmering, and proceed with the instructions as written. The final texture and flavor remain consistent.
- → What's the best way to store homemade gummies?
Keep your gummies in an airtight container in the refrigerator. They'll maintain their texture and flavor for up to two weeks. The sugar coating helps prevent sticking, though it's optional.
- → How do I make these gummies vegan?
Replace powdered gelatin with 1.5 tablespoons of agar-agar powder. Note that the setting time and ratios may differ slightly, so you might need to experiment to achieve your preferred texture. Agar sets more firmly than gelatin.
- → Why strain the black currant mixture?
Straining removes skins and seeds, creating smooth, uniform gummies without fibrous bits. The fine mesh strainer captures all the pulp and juice while separating out the solids that would affect the final texture.
- → Can I use other fruits in this method?
Certainly! Raspberries, blueberries, strawberries, or even mango puree work beautifully with this technique. Adjust sugar levels based on fruit sweetness, and maintain the same gelatin-to-liquid ratio for consistent results.